Undeniable fact number one: people loves fireworks. Now pair the awe-inspiring quality of fireworks with the magic and warm fuzzy feelings of Disney, and you’ve got a match made in heaven. So if you’re like us a couple years ago, and just want to be able to capture the moment of a Disney Parks fireworks show, buckle up, because this post is for you.
What you need:
1. Tripod
Let’s face it, nobody enjoys lugging a tripod around with them, especially at Disney Parks. But if you want to take those beautifully-streaked, wow-factor firework photos, a tripod is a MUST; its the only way you can keep your camera still for the long exposures necessary (don’t worry, we’ll get to that).
There are two qualities that your tripod should possess if you’re tackling firework photography at a Disney Park: sturdiness and height. The last thing you need to be worrying about while taking firework photos is if the wind will make your photos blurry. If you can, purchase a stand that feels well-made and looks like it’ll stay put. The majority of tripods will do this just fine, so you don’t have to worry too much about it. If you’re looking for a sturdy tripod at a great value, check out the Amazon Basics 60-inch Lightweight Tripod; we’ve been using it since our first cheap tripod broke, and have been really impressed with the quality. On to the second, and probably more important quality: height. Our first tripod was a measly 4 feet tall, which left our well-crafted firework photo plans susceptible to children. Trust me, you don’t want the quality of your photos to rely on the hope that no child is going to squeeze in front of you at the last minute before the firework show. To really get above the rest of the heads, I recommend a 6 foot tripod (or taller, if you’re willing to carry it). Our current tripod, the Amazon Basics mentioned above, is a little shy of 6 feet, and we still feel limited sometimes when we’re in a crowd. Our next tripod will most likely be the AmazonBasics 70-Inch Pistol Grip Tripod, so that we make sure that we aren’t hindered by tall dads in front of us, without breaking the bank.
2. Shutter release
Next on your must-have list is a shutter release. This nifty little gadget allows you to open your shutter (aka take a photo) without actually pushing the button on your camera. This keeps your camera nice and still for those long exposures. We bought a pretty cheap shutter release when we were first buying camera gear, which has done the job. It is wireless, which made it difficult while taking firework pictures, because we have to point the remote at the front of the camera, which is kinda hard if you’re standing behind the camera for firework pics. So we recommend getting the Polaroid Shutter Release Timer Remote Control, first because it has a cable, and secondly, because it has a lot of useful features, like an interval timer and shutter speed adjustment.
3. DSLR or camera with a long shutter speed
NEWS FLASH: You need a camera to take firework photos. Crazy, I know. Just make sure that your camera has a long shutter release option (at least 8 seconds). Entry-level DSLRs will have all the features you need. All of our pictures are taken with the Nikon D3200, which we’ve been really happy with, considering how it is an entry-level DSLR.
4. Optional: ND Filter
A neutral density filter (or ND filter) is most often described as sunglasses for your camera. Just like sunglasses, a neutral density filter reduces the amount of light that reaches the sensor, allowing for longer shutter speeds to get the most fireworks in your shot as you want! Remember, you are shooting at night, so make sure that your ND filter is not too dark. We have a Hoya ND filter, and its worked great for us. We recommend the Hoya ND8 Neutral Density Filter, which reduces the amount of light by three stops. Try not to get a filter darker than this for fireworks, because it’ll just be a struggle. One more tip: get a 77mm filter and use step-down rings to fit all your lenses.
5. Optional: Lens with zoom and High aperture
If there was only one piece of photography equipment that you could really invest in, make that item a great lens. If you’re still using the lens that came with your DSLR, just trust me, once you try a great lens, you’ll never go back. Whichever lens you land on, make sure that it’ll allow for high apertures (f16 and above). In order to have your shutter open for long periods of time, you’ll need high apertures to balance your exposure. Our current lens is one of my favorite items that we own, because the picture quality is just stunning. If you’re looking for a great lens upgrade, you will not go wrong with the Sigma 18-35mm f1.8. With wide angles and super-buttery booked, this lens may just be the most versatile lens you’ll ever own.
Step by Step Instructions:
Alright, now that you’ve got everything you need, lets dive into a step-by-step guide to get you taking those photos you see on postcards.
1. Location, Location, Location
Out of all the tips we’re laying out for you, this one will have the most drastic impact on the outcome of your photos. Let’s face it, when it comes to good firework-watching locations, even the most civilized of humans devolve into neanderthals to get the best spot. So if you don’t want that dad moving right in front of you with his kid on his shoulders one minute before fireworks, you’ll have to find a spot that will give you a great composition, but also won’t be blocked by park-goers. In Magic Kingdom, we recommend the end of Main Street, the lawn by the hub, the balcony by the train station, and the dock at the Transportation and Ticket Center. Extra tip: the fireworks in Magic Kingdom are lit from behind New Fantasyland, so you won’t be able to get fireworks photos of Cinderella Castle if you’re IN Fantasyland.
2. Composition
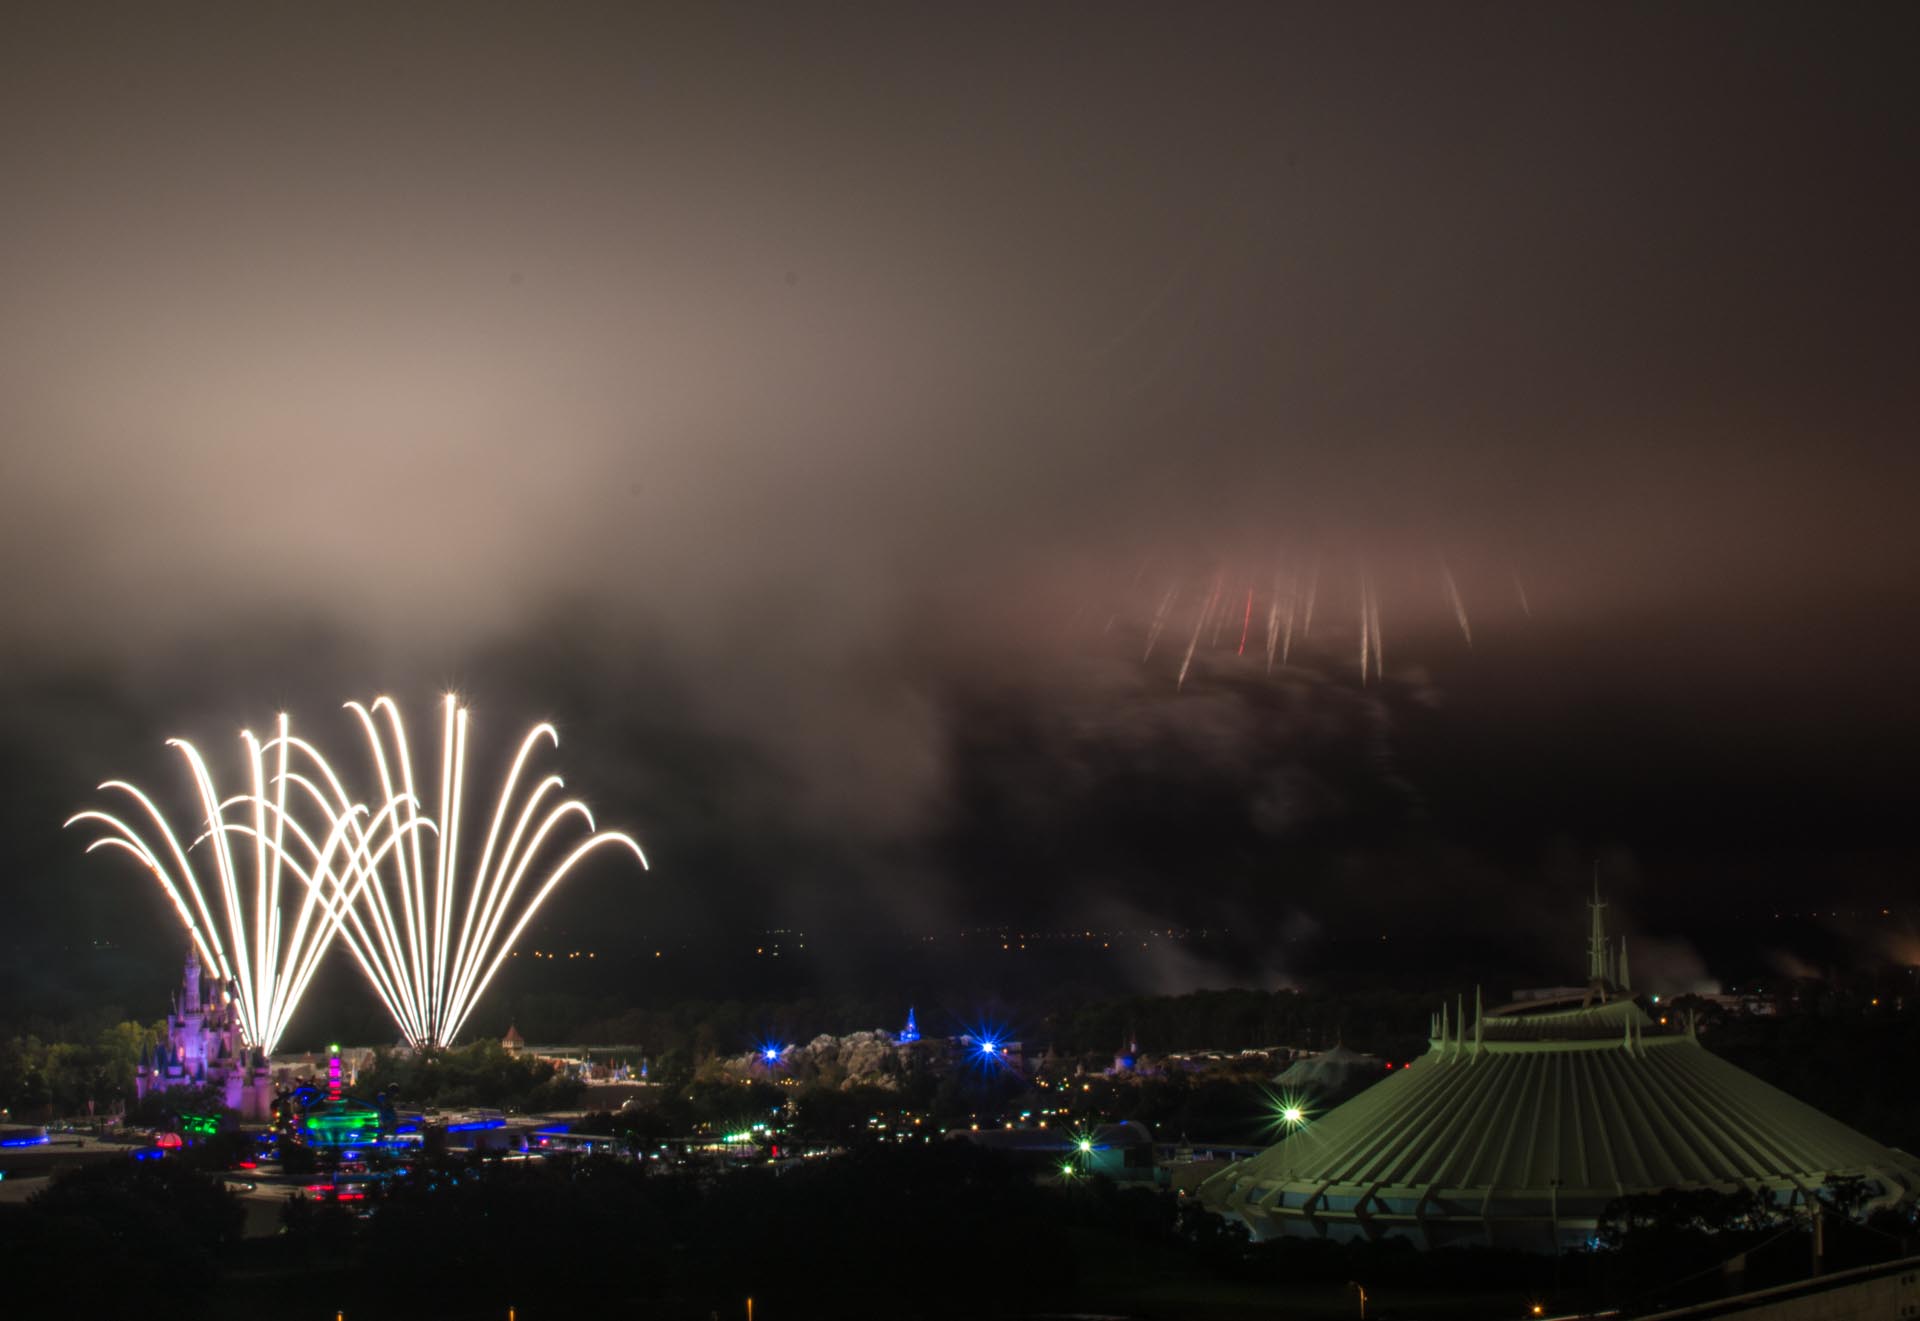
Here’s the truth: pictures of only fireworks are just plain boring. As sparkly as those beautiful streaks are, they serve their best purpose highlighting a subject. In most Magic Kingdom firework photos, the subject is Cinderella Castle. But getting creative with your subject and composition will take your photos to the next level. Just remember, you’re taking pictures of Disney World with fireworks in the background. Experiment with the rule of thirds, or leading lines, and brush up on your composition skills before your trip.
3. Settings
Alright, lets get down with the details, and in 6 steps, you’ll have the technical know-how to get those firework pictures you’ve always wanted.
1. Set up your tripod
Once you find your spot, set up your tripod and get your composition set.
2. Manual Focus
Change the setting on your lens to manual focus, and zoom out to the infinity sign, or focus on your subject. This will keep your camera from trying to focus in the dark.
3. ISO
Set your ISO to 100. This will give you the least amount of noise and allow for long shutter speeds
4. Shutter Speed
Set your shutter speed anywhere longer than 5 seconds. You want to give each exposure enough time to capture multiple fireworks. I recommend starting at 15 seconds, and adjusting from there.
5. Aperture
Once you have your shutter speed set, balance your exposure by raising your aperture. After your first photo, you can adjust your aperture depending on how bright the fireworks were in your photo.
6. Shutter Release
Connect your shutter release and change the settings on your camera to use the shutter release. Then stand back, relax, and wait for the show to start.
4. Timing
Make sure that you time your shutter releases appropriately. If you start too early, your photo might start processing right when it reaches the part you wanted to photograph. The longer the shutter speed, the longer it will take in-between shots to process the photo. There’s a lot of trial-and-error in this step, so just be patient with it.
5. Adjusting
Make sure you’re looking at your photos in between to check for any unwanted heads, over-exposure, etc. and adjust accordingly.
6. Post-Processing
Once you get home, you’ll want to edit your photos. We use Lightroom for all our post-processing work, and I would recommend it if you want to make the investment and don’t need all the tools that come with photoshop.
And last but not least, don’t forget to enjoy yourself! Remember: you’re on vacation, so don’t let any camera frustrations get in the way of the magic in Disney World. We hope you found this helpful, and would love to see your photos if you implement any of our tips. If you have any questions about gear, or want to dig into the technical side a little more, just leave us a comment, and we’ll help you out. And as you’re standing on Main Street with the glow of fireworks all around you, don’t ever forget to believe in your wishes, for they are the magic in the world.


 2. Composition

 4. Timing

